
Add the power and convenience of scheduling to your Shopify Theme using liquid
As an eCommerce store owner, I’m sure you run sales and promotions to boost revenues. As you know, there are many things that go into launching a successful sale.
Some examples are:
- Creating a discount code, Shopify script or free shipping method
- Making creative for emails, your homepage CTAs and social posts
- Marketing the sale so your customers are aware of it
At RIPT Apparel, we launch new products every single day at Midnight CST, but lucky for me, those new products are scheduled well in advance in our custom back-end and then published at their desired times.
But, in the past, when I needed to change out a Hero image on our homepage (for example) to showcase a BOGO Sale that was launching at Midnight the next night, I’d actually have to stay up until Midnight!
Staying up until Midnight just to click a checkbox isn’t something I enjoy.
So I decided to remove that burden and built scheduling into my theme!
What we’re going to build
A theme section for a Hero Image that will automatically show and hide based on a start and end date you choose.
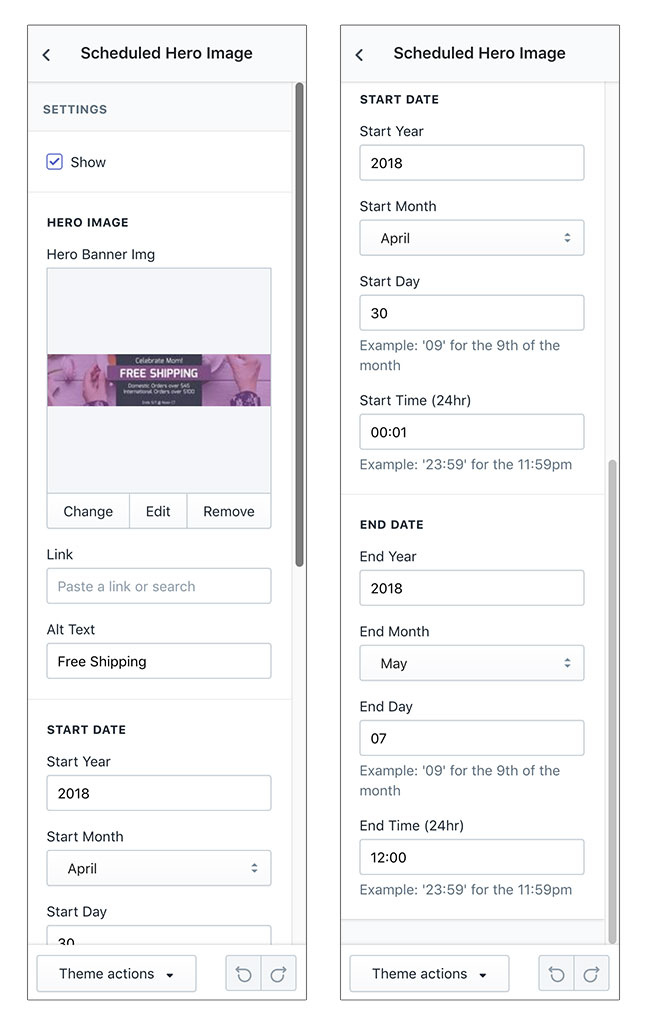
What the settings look like (Section’s front-end)
Here we have some basic stuff like a checkbox so I can quickly toggle on/off the section as a whole. I can upload an image, input a link and add alt text.
Then I added inputs and drop-downs so I could enter start and end dates/times.
What time is it?
TL;DR - You can get the final theme section code here, but follow along below.
{% assign current_date_time = 'now' | date: "%Y%m%d%H%M" %}
First, we need to capture the current date and time! To do so we use a date filter in liquid, and assign now (the time right now) to variable current_date_time.
What’s that junk at the end you ask? That’s liquid’s strftime method. It’s how dates and times are formatted in liquid, which is what liquid is written in.
If the current date and time is: May 2nd 2018 5:12 PM
%Y%m%d%H%M would become 2018050217:12. Check out this handy cheat sheet for more information.
Constructing the start date
We need to grab the desired start_date from the section settings entered on the front-end. Here is the code that does that.
{%- assign start_year = section.settings.start_year -%}
{%- assign start_month = section.settings.start_month -%}
{%- assign start_day = section.settings.start_day -%}
{%- assign start_hour = section.settings.start_hour | remove: ':' -%}
{%- assign start_date = start_year | append: start_month | append: start_day | append: start_hour | convert: "date" -%}
Here we have 4 variables, one for the year, month, day and hour. Then we have a 5th variable called start_date which combines them all together.
Notice: in start_hour, we are removing the :
We assign start_date to start_year, then append start_month, and append start_day and append start_hour, then convert it to a date.
We end up with just a number: 201805021712 (May 2nd 2018 5:12 PM)
Choose the end date
Duplicate the start date code and replace the words start with end.
This is where the magic happens!
{%- if current_date_time >= start_date and current_date_time < end_date -%}
  <a href="{{ section.settings.link }}">
    <img
     src="{{ section.settings.img | img_url: '1296x', format: 'pjpg' }}"
     alt="{{ section.settings.alt }}
     ">
  </a>
{%- endif -%}
Since we know the current_date_time we can now compare it to the start_date and end_date. Now, the hero image will only display if current_date_time falls between start_date and end_date.
Final thoughts
This has been a lifesaver for me and I’m getting much more sleep now.
I know I’ve probably skipped some things that might be important to you successfully implementing this in your theme. One thing that I purposely skipped was showing you all the section’s schema code. I’m not going to bloat this post with all that so please grab the final section code here.
Hopefully, you can use this to your advantage when running sales and promotions or even if you just want more control over swapping content out on your store.
I’m open to your thoughts and comments and if you find any efficiencies in my code, please fork the gist. You can always reach me at tjmapes [at] gmail [dot] com.